Farwell, Ozman, and Kirk was a hardware wholesaler that started in the late 19th century, the oldest date I have been able to find is a dated 1894 photograph. They sold items with their company name on them to stores all around the country but had the most impact on the Midwest since the company’s base was in Minnesota. The company closed sometime in the 1980’s, I have yet to find a source that clearly pins down a year. Since the company was a wholesaler, they cooperated with smaller hardware stores and even some larger companies like Sears and Roebuck to satisfy supply needs.

This style of oven was just as likely to have been seen in camp setting or a household kitchen on top of a wood stove or gas stove. Stoves with ovens were still a luxury in the late 19th century and early 20th century. One would need to save up to buy a stove with an oven or buy on credit. Cities with high population also dealt with cramped living spaces so a space saving option would have been a portable oven that could serve as a container for pans or dishes when not in use. I can remember a similar situation in my own life as a newly married couple trying to save money. In our first apartment we purchased a small portable washing machine with a 5 gallon capacity that would hook up to our small kitchen sink! Another reason for buying a portable oven that could fit on the stove is to expand the baking capacity temporarily of your home kitchen…think holidays when the meat is in the main oven and the dessert baking on top of the stove.


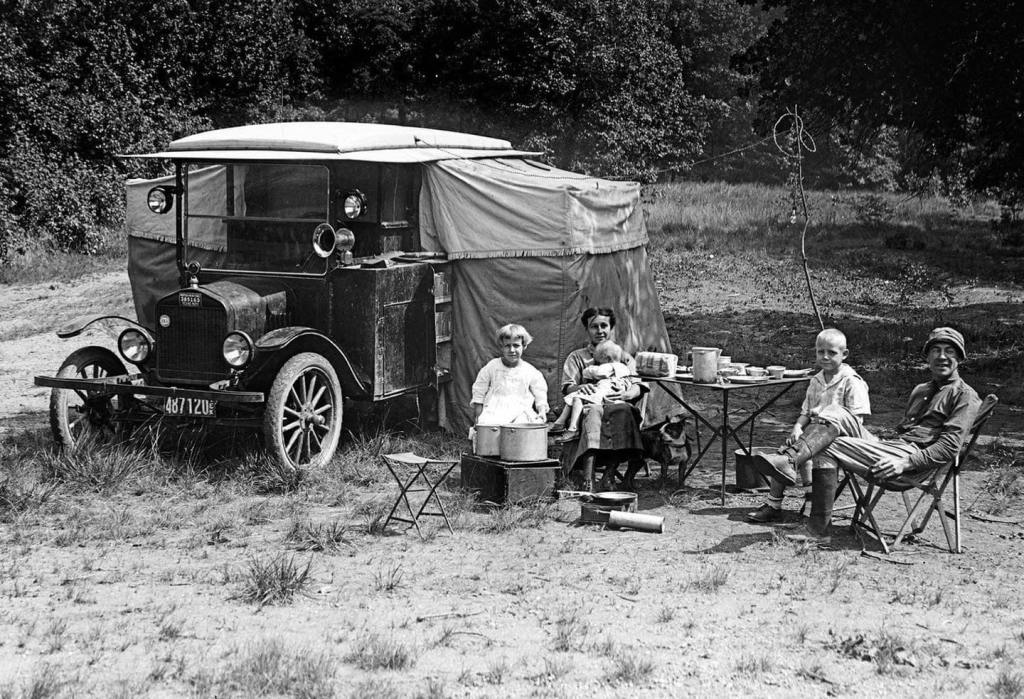
Why an oven for camping? Just like today there are many styles of camping and depending on the length of your stay and the size of your group you may want an easier way of baking breads, roasting meat, or making desserts instead of the more primitive ways on a campfire. The Dutch Oven still remained king in most camps since you could do anything with it on a fire or a fancy gas camp stove, but for campers who wanted a bit more convenience or whose camp cook was more accustomed to domestic home cooking, the oven was a necessity and worth the weight and space. The early motor camping movement exploded in the early 20th century with the advent of affordable motorized transportation. In the United States technology, a strong economy, and the changing labor environment, and rapidly growing environmentalism/National Parks all came together at a crossroads that made traveling and seeing the country possible and exciting. MANY other factors contributed as well including vibrant youth organizations (YMCA, Boy and Girl Scouts, and Campfire Girls to name just a few), veteran reunions, WWI veterans with their new worldly experiences, age of explorations/safaris/adventurers, radio, books and journals, and the rising availability of swift affordable transportation outside of the automobile such as trains, planes, and faster ships.
One of the features of the style of oven in my video is that it includes tempered heat resistant glass. This was considered a big selling point so the cook could just glance in the oven to check the status of the food. Some “camp” ovens in the early 20th century included thermometers and by the 1950’s thermometers was a standard accessory while the glass windows option faded away. Some early and cheaply made ovens had a single wall of steel which was not as effective in maintaining the heat as a dual walled oven. The corrugated interior achieved 2 things, it kept the heat inside the cooking space and let only a small fraction of the heat to escape to the outside wall. (Youth Womack Discussion Credit) The dead space between the two walls also worked to insulate the heat from escaping making this fairly simple cooking accessory really good at it’s job as an oven, conserving energy! As someone who used a single wall camp oven (which can be found on this article), the amount of time to bake and the amount of fuel exhausted in the effort was almost double that of this portable oven. Both uses were in the summer heat of an ambient outside temperature of 88 degrees Fahrenheit.


In my video you see two different items getting baked, one is a dump cake which originates likely as early as the 1950’s and the other is the original brownie recipe which dates from 1893.
Dump Cake
Ingredients:
- 1 box of cake mix
- 2 cans of fruit pie filling or topping
- 1-2 sticks of real butter
- 1 can of soda
Directions:
- If you use a Dutch oven, line the interior with foil or use a pie pan sitting on top of 3 small stones/ceramic tile that will fit into the bottom. This will prevent the cake from burning and make cleanup much easier.4 (3.5 ounce bars) semisweet chocolate
- Pour 1-2 cans of the pie filling or topping of your choosing onto the bottom of the Dutch oven or pan and spread evenly
- Pour the entire contents of your boxed cake mix covering the pie filling and spread evenly
- Cut your 1-2 sticks of butter into roughly 1/8″ pats and place evenly on the surface of the cake mix.
- Depending on the container depth, you then pour as much of your chosen soda onto the top of the mix and butter carefully making sure to spread the pour evenly making sure that you do not overfill your Dutch oven or pan.
Note: Experiment with different cake mixes and sodas. Chocolate cake mix and cherry cola goes very well together and so does yellow cake mix and citrus based sodas. Serve this high sugar dessert with some Ice cream and you may need to check your blood sugar afterwards, but boy is it delicious!
Palmer House Brownie Recipe
Please visit the Palmer House Hotel website for the neat history and official recipe write-up: Palmer House Hotel
Ingredients
Brownies:
- 1 pound butter
- 4 (3.5 ounce bars) semisweet chocolate
- 1 ½ cups white sugar
- ½ cup all-purpose flour
- 8 eggs
- 1 tablespoon vanilla extract
- 1 ½ (8 ounce) packages crushed walnuts
Glaze:
- 1 cup water
- 1 cup apricot preserves
- 1 teaspoon unflavored gelatin
Directions
Instructions Checklist
- Preheat the oven to 300 degrees F (150 degrees C). Grease a 9×12-inch rimmed baking sheet.
- Place butter and chocolate in the top of a double boiler over simmering water. Stir frequently, scraping down the sides with a rubber spatula to avoid scorching, until chocolate is melted, about 5 minutes.
- Combine sugar and flour in a medium bowl.
- Add chocolate mixture to sugar mixture and mix well, about 4 to 5 minutes. Mix in eggs and vanilla extract.
- Pour batter into the prepared baking sheet. Sprinkle walnuts on top, pressing down slightly into the batter.
- Bake in the preheated oven until edges start to crisp and brownies rise about 1/4 inch, 30 to 40 minutes.
- Mix water, apricot preserves, and unflavored gelatin in a saucepan to make the glaze. Mix thoroughly and bring to a boil for 2 minutes.
- Remove brownies from the oven and allow to cool for 30 minutes before spreading a thin layer of the glaze on top with a pastry brush.

If you enjoy traditional campcrafting, bushcrafting, hiking, hunting, or other outdoor adventure then I invite you to join us in the Guild!


